Comforting Recipes for Health & Immunity

1

Whip up one of these recipes the next time you’re under the weather for healing and relief.

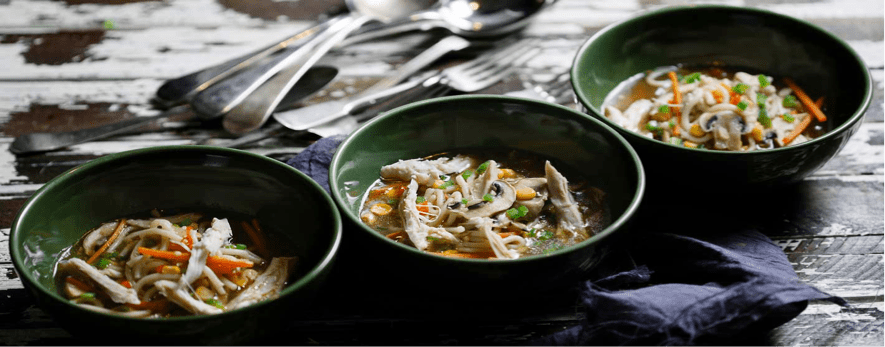
A wise Greek man once said, “Let food be thy medicine and medicine be thy food.” We’d like to think that if Hippocrates were still around he might appreciate the 44-garlic soup, lemon ginger honey tea, and other dishes that follow. Whether you’re nursing a runny nose, stuffed-up head, upset stomach, or a general case of the blahs, the following immunity recipes offer a natural pathway to relief. While we can’t promise that you’ll forgo the doctor’s office altogether, we can assert that the foods below are warming, comforting, and contain ingredients with healing properties that will ease your symptoms and boost your body’s immune defenses. Plus, they’re packed with delicious flavors you may want to come back to even when you’re not sick.

2

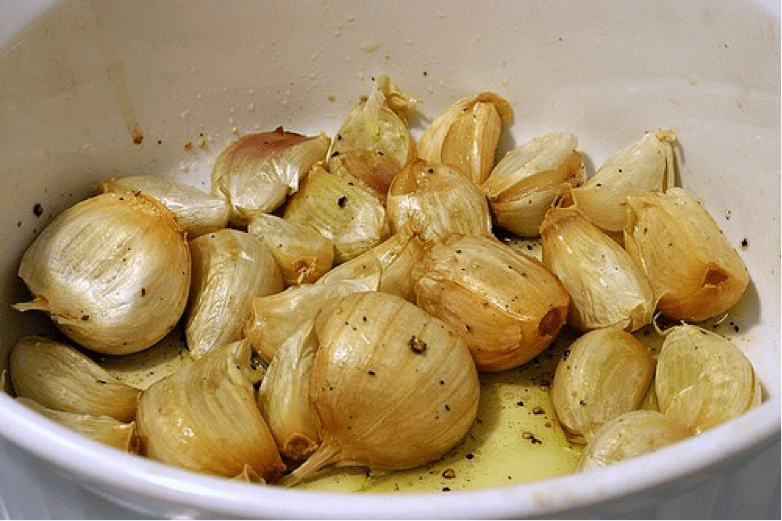
44-Clove Garlic Soup
Garlic is packed with antioxidants and may give your immune system a boost in warding off a cold. This recipe was adapted from Bon Appetite by Deb Perelman at Smitten Kitchen. As for the handfuls of garlic contained in this recipe, she summed it up best: “The soup has 44 cloves of garlic in it. 28 are roasted and then peeled, 18 peeled and then simmered, and somehow the outcome is subtle, but not boring.”

Serves 4

26 garlic cloves (unpeeled)
2 tablespoons olive oil
2 tablespoons (1/4 stick) butter
2 1/4 cups sliced onions
1 1/2 teaspoons chopped fresh thyme
18 garlic cloves, peeled
3 1/2 cups chicken stock or canned low-salt chicken broth
1/2 cup whipping cream
1/2 cup finely grated Parmesan cheese (about 2 ounces)
4 lemon wedges

Preheat oven to 350°F. Place 26 garlic cloves in small glass baking dish. Add 2 tablespoons olive oil and sprinkle with salt and pepper; toss to coat. Cover baking dish tightly with foil and bake until garlic is golden brown and tender, about 45 minutes. Cool. Squeeze garlic between fingertips to release cloves. Transfer cloves to small bowl.

Melt butter in heavy large saucepan over medium-high heat. Add onions and thyme and cook until onions are translucent, about 6 minutes. Add roasted garlic and 18 raw garlic cloves and cook 3 minutes. Add chicken stock; cover and simmer until garlic is very tender, about 20 minutes. Working in batches, puree soup in blender until smooth. Return soup to saucepan; add cream and bring to simmer. Season with salt and pepper.

Divide grated cheese among 4 bowls and ladle soup over. Squeeze juice of 1 lemon wedge into each bowl and serve.

Can be prepared 1 day ahead. Cover and refrigerate. Rewarm over medium heat, stirring occasionally.

3

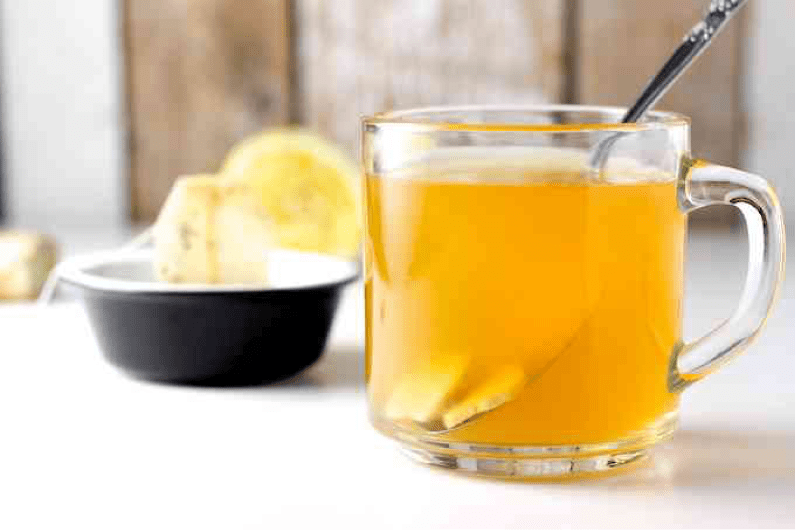
Lemon Ginger Honey Tea
Reap the soothing effects of lemon and honey with the invigorating zip of ginger in this throat-soothing cocktail. There’s no need for whiskey in this home remedy, just let the antimicrobial effects of honey and anti-inflammatory properties of ginger do its work.

Ingredients

  • 1-inch fresh ginger root (no need to peel it)
  • 1 cup water (boiling)
  • 1 tablespoon lemon juice (freshly squeezed)
  • 1 tablespoon honey (raw, unpasteurized)
  • Optional: 1 shot whiskey

Preparation

  1. Bring water to a boil and remove from heat.
  2. Cut lemonand ginger into thin slices. Add to the hot water.
  3. Steep for 5-10 minutes.
  4. Strain and pour teainto mug.
  5. Add honey, stir, and serve.

4

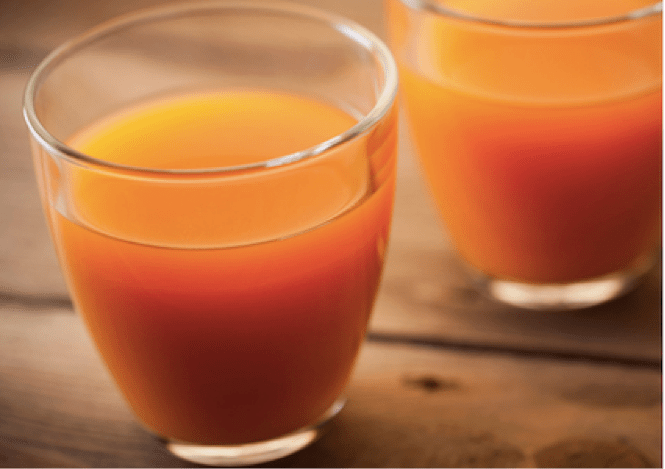
Immunity-Boosting Juice
If you feel a cold coming on it’s a good idea to pay extra attention to your diet. This juice blend of carrot, apple, ginger, and lemon is packed with vitamin C and antioxidants to help fortify your body’s defenses before you get sick.

Reap the soothing effects of lemon and honey with the invigorating zip of ginger in this throat-soothing cocktail. There’s no need for whiskey in this home remedy, just let the antimicrobial effects of honey and anti-inflammatory properties of ginger do its work.

INGREDIENTS:

  • 2 apples
  • 5 carrots
  • 1 in (2.5 cm) piece of ginger root
  • 1/4 lemon, peeled

DIRECTIONS:

  1. Wash all ingredients.
  2. Cut produce to fit into your juicer and juice!
  3. Enjoy this juice daily for preventative health benefits.

Servings:1


By – Amanda Jedeikin


November

november

For the month of November, we will get practical and explore some Yoga Postures which can help you with:

Back Pain, Digestive Problems and simply Improving your Posture, as well as delicious and healthy recopies for this season.

Please enjoy the three articles below.

…and give Thanks! 😊

10 Yoga Postures for Back Pain

For most of our lives, we take our backs for granted. But at some point in just about everyone’s life, our backs revolt and remind us that they need love and attention too. Thankfully, for many of us, the pain is only temporary. But for others, it can be much more debilitating—and much more frustrating.

In severe cases, medical attention may be necessary, but if your pain is less severe, yoga may be able to help by strengthening the back, stretching it and improving circulation to the spine and nerves. Here are some yoga postures for back pain.

  1. Cat/Cow

13

Starting in tabletop position on your hands and knees, alternate between arching your back and rounding it as you push down on the floor with your hands and tops of your feet. These postures help to massage the spine, while also stretching the back and the torso. These postures are a great way to keep the back limber—and happy.

  1. Spinal Twist

14

You have many options when it comes to twisting postures. One of the basic and effective ones is Marichyasana C. Keep your left leg straight and bend your right leg so your foot is flat. Place your right hand on the floor behind you for support, like a tripod, and twist so you can hook your left elbow over the right thigh.

If this is too much, you can also grab hold of your right knee and twist to look over your right shoulder. Other options are to bend the left leg under you or bend both legs and let them fall to the side then twist in whichever way your knees are facing.

  1. Downward Dog

15

There’s a reason Down Dog is one of the most iconic postures in yoga. It can rejuvenate your entire body. Start in tabletop and raise your hips so your body is in an upside down V position. Relax your head and neck and draw your inner thighs toward the back of the room. Spreading your shoulder blades apart will stretch your upper back even more, and reaching your hips up and back will help to open your lower back.

Breathe for five to seven breaths.

  1. Plow Pose

16

From Shoulder Stand, bend at your hips to bring your toes or top of your feet to the floor. Your hands can remain against your back for support, or you can clasp them together, keeping your forearms on the floor. Hold this as long as is comfortable to get a powerful stretch in your shoulders and spine. If this is too much, you can place a chair behind and you rest your feet on the chair.

  1. Seated Forward Fold

17

It’s easy to do a Seated Forward Fold in a way that won’t benefit you, but doing it right can open the lower back and offer relief from stiffness and pain. From a seated position with your legs extended forward, reach for your shins, ankles, or feet, bending at the hips.

Instead of rounding your back, continue to reach your sternum forward, lengthening the torso. If this hurts your back, bend your knees as needed.

  1. Child’s Pose18

Not only is Child’s Pose an amazing way to relax, it can also stretch your entire back and your hips. Start on all fours, keep your arms forward and sit back so your butt is resting just above your heels. Hold and breathe deeply, feeling the breath reach all the way into your hips. The more you extend in either direction, the more you’ll feel relief.

  1. Eagle Pose19

This more advanced posture requires balance and strength, but it can help to stretch and open your entire back. From Mountain Pose, with your knees slightly bent, lift your right leg and reach your right thigh over your left. Point your foot toward the floor, and either stop here and balance with your toes on the floor, or hook your right foot behind your left calf.

For the arms, bring the right arm under the left and, with elbows bent, bring your palms together. You’ll get a powerful stretch by drawing your elbows up and hands away from your face.

  1. Locust Pose

20

Locust is a great way to strengthen your back and buttocks. Lie on your stomach with your arms beside you, palms up, you and your forehead flat on the floor. Slowly lift your head, torso, arms, and legs away from the floor. As you do this, your thighs should be rotated in slightly and you want to feel your body elongate from head to toe. Hold this for 30 seconds to a minute.

If you’re up for it, relax and repeat two to three times.

  1. Bow Pose

21

Lying face down, reach your hands toward your ankles and grab hold one at a time. Slowly lift your chest and thighs away from the floor by drawing your chest forward and the back of your thighs toward the sky. This posture is a wonderful way to strengthen the back muscles, but if you have a back injury, take this easy as it can be intense.

10.Triangle Pose

22

Back pain can be helped, and in some cases prevented, with stretching and strengthening—and Triangle Pose can do both.

Stand with your feet about three feet apart and parallel to each other. Rotate your right foot so the right heel is in line with the arch of the left foot. With your arms extended to the side, tilt at the hip to reach your right hand toward the ground, on either side of your foot. Rotate your body to the side and reach the fingers of your left hand toward the sky.

Gaze at your left hand (as long as it doesn’t hurt your neck!) and hold for five to seven breaths before switching sides.

When it comes to back pain, prevention is key to a long and pain-free life, but listening to your body is also extremely important. Don’t force any posture that could cause injury. If your pain is extreme, you may want to seek medical attention.

By: Liz Rosenblum

5 Yoga Postures to Improve Digestion

7

Indigestion, cramping, bloating, constipation. We all experience these things from time to time, and they can be absolutely no fun.

We all know that yoga asana is great for helping back pain, stress relief, increasing oxygen intake, as well as being awesome for mental health…But did you know that yoga asana can also be a tool to help improve your digestive function?

Yoga asana offers several postures that help cleanse, stimulate, aid, and encourage good digestive function. It’s best not to practice yoga right after a meal, but if you’re feeling any kind of bloating, gas, or indigestion a few hours after a meal or the morning after, here are five yoga postures to improve digestion.

  1. Peacock Pose (Mayurasana)

8

Yogi masters say that if you practice this pose consistently, you’ll be able to eat anything you want and have perfect digestion. During the pose, you’ll place pressure on the digestive organs by balancing the weight of your torso on your arms, which will cut off blood supply to the digestive organs for a moment.

Then, when you release the pose, lots of fresh, oxygen-rich blood will flow to the digestive organs and improve their function. The compression will also help move anything through that may be stuck.

  1. Wind Relieving Posture (Pavanamuktasana)

9

This pose is awesome if you struggle with sluggish digestion, or if you have trapped wind. Take this pose slow, and be sure to combine it with your breath; exhaling as you draw your knees into your chest, and inhaling as you allow them to flow away. I also recommend practicing this one before going to bed.

  1. Half Lord of the Fishes (Ardha Matsyendrasana)

10

Twists in general are so helpful for improving digestion, and Ardha Matsyendrasana is no exception. It has a specific ability to cleanse the digestive system. While you are twisting, you are reducing blood flow to the digestive organs, so when you release, you’re letting in “new” blood to the digestive organs.

You can also think of twists as having the same effect on your digestive system as twisting a cloth—you will be wringing out the toxins.

  1. Seated Forward Fold (Paschimottasana)

11.png

Paschimottanasana is amazing for stretching and lengthening the back, but did you know that if you add a little prop to it, it becomes a great digestive aid posture?

By placing a bolster or pillow on your thighs, and allowing your belly to rest upon it when you fold forward, you’ll be creating space for a digestive massage to take place. Each time you take a full inhale, the bolster or pillow will resist against your belly, causing a compression.

Then, when you exhale, you release the compression, creating new flow to the area. Repeat this breathing into the bolster or pillow as many times as feels comfortable for you.

  1. Corpse Pose (Savasana)

12

The ultimate posture for all healing is Savasana. When you’re at rest, you’ll be tapping into your parasympathetic nervous system. This is also knows as your “Rest and Digest” response.

As you lie still, you’re allowing all stresses to melt away and you’re literally creating a healing environment for your body. Your blood will start to flow away from your extremities and towards your digestive organs. Your heart rate will slow, and your breathing will deepen.

All of this increases oxygenation to the digestive organs. This also creates the ideal environment for digestion, cleansing, and healing.

So, the next time you’re faced with digestive upset, give some of these postures a try! You may be surprised how well they work!

By: Ali Washington


5 Yoga Poses to Improve Your Posture

1

Stand up straight! Don’t slouch! These are reminders you probably heard growing up, but healthy posture truly is an important element of overall wellness. Harvard Medical Schooldefines “good posture” as:

  • Chin parallel to the floor
  • Shoulders even (roll your shoulders up, back, and down to help achieve this)
  • Neutral spine (no flexing or arching to overemphasize the curve in your lower back)
  • Arms at your sides with elbows straight and even
  • Abdominal muscles braced
  • Hips even
  • Knees even and pointing straight ahead
  • Body weight distributed evenly on both feet

Research showsthat standing up straight is essential for building self-esteem, improving mood, and managing stress. Living life with a hunch in your shoulders, unnatural rounding in your back, or extreme arching in your back can lead to neck pain, chronic discomfort, and a general feeling of malaise. In her oft-viewed TED Talk, social psychologist Amy Cuddy extols the benefits of “power posing,” which involves standing like Super Woman for a few minutes to improve confidence and give yourself a mood boost (Try it, it works!). In yoga philosophy, standing up well is related to the Solar Plexus Energy Center or Manipura Chakra, physically located at the core, waist, and mid-back. When the Solar Plexus Chakra is in balanced, you feel confident and you’re able to (physically and mentally) stand up for your beliefs and yourself.

Picking up children, driving, carrying bags, working at a computer, and any number of other daily tasks can really do a number on your back and upper body. There are several yoga poses to improve poor posture and most are easy postures that can be done at home. If you’re looking for a simple back posture corrector, give yourself the gift of better posture by moving through some of these yoga poses.

Try these yoga poses at home to improve your posture. They can be done on their own whenever you find time, or as a simple sequence upon waking or before bed. One of these poses might be the posture corrector that does the trick.

  1. Reclining Spinal Twist (Supta Jathara Parivartanasana)

If you’re only going to do one yoga pose to help improve your posture, please try this one. A simple, yet powerful pose that you come into from resting on your back, this pose is wonderful to do first thing in the morning or right before getting into bed (or even IN bed!). This pose will help to release kinks and tension built up from long bouts of standing, sitting, and all of your other daily tasks. Give it a try:

2

  • Come to rest on your yoga mat on your back. If you like to have your head supported, place a pillow or blanket beneath your head.
  • Hug your knees into your chest and enjoy a few deep breaths. Inhale and exhale slowly.
  • Extend your arms out in opposite directions, like a capital “T”.
  • Bring your knees out at 90 degrees so that your shins are parallel to the earth and your knees and torso create an “L” shape.
  • Take a big breath in and press your mid-back into the ground.
  • As you exhale, tip your knees over to the left side of your body. Allow your feet to come to the ground and your knees to come to the ground.
  • Bend your left elbow and push it into the earth. Slide your left shoulder several inches to the left so that it is untucked. Rest both shoulders and arms on the ground.
  • Turn your head left and right like you’re saying “no” a few times. Allow your head to turn either direction that feels most natural for you without any struggle or strain and rest there.
  • If you can breathe comfortably, stay there. If you don’t feel comfortable, try these variations: place a blanket or pillow between your knees so that your ankles, knees, and hips are in one line. If you like extra support, place your left hand on your left knee for some grounding. If you like extra support, place a pillow or bolster behind your back for some grounding.
  • Settle into stillness and stay in the pose for three to five minutes, breathing deeply.
  • Bring your knees back into your chest and roll around on your back a little bit.
  • Repeat your twist on the second side and hold for three to five minutes.
  • Bring your knees back into your chest and roll around on your back a little bit.
  • Take a few moments to rest flat on your back.
  1. Supported Fish Pose (Matsyasana)

This supported heart opener helps to open up the chest and upper back. Many of us hunch forward or round during our daily activities and this pose helps to counteract the effects of that rounded action. Use a block, bolster, or roll of blankets for support in this pose. Give it a try:

3

  • Come to sit on your yoga mat and gather your block, bolster, or roll of blankets.
  • Roll back onto your support props until they rest just beneath your shoulder blades. It is not an exact positioning! Roll around, move the props, and adjust until you feel comfortable.
  • Tip your head back onto your mat or onto another prop for support.
  • Rest your arms open or down to your sides.
  • Extend your legs out in front of you. If you experience low back tenderness, place a pillow or blanket beneath your knees.
  • Settle into stillness and stay in the pose for three to five minutes. Relax your shoulders, neck, and forehead. Breathe deeply.
  • Roll gently to your side, slide the props out, and come to your back.
  • Bring your knees back into your chest and roll around on your back a little bit.
  • Take a few moments to rest flat on your back.
  1. Mountain Pose (Tadasana or Samasthiti)

This neutral standing pose is a helpful practice for how to actually stand well. This is a beneficial yoga pose to improve your posture because it requires balance, poise, strength, awareness, and both effort and ease. To the outside observer, this pose may appear as if you’re just standing there, but you’ll know that, at least at first, this poserequires mindfulness. Give it a try:

4

  • Come to stand on your yoga mat.
  • Turn all your toes to point forward and bring your feet parallel with each other. Stand with your feet just as wide as your hips. One method to find this alignment is to place your fingers on the front of your pelvis (the anterior superior iliac spine/ASIS bone) and line up your feet just below.
  • Rock back and forth and side to side to evenly distribute the weight between your feet and into all parts of your feet.
  • Engage your legs without locking your knees.
  • Angle your tailbone to point slightly more down towards the ground.
  • Stand up tall and reach your hands down beside your thighs. Spin your palms to face forward and actively reach your fingers towards the earth.
  • Allow your chest to open without arching your back and allow your shoulders to relax away from your ears.
  • Reach the crown of your head up toward the ceiling while keeping your chin parallel to the earth.
  • Feel the long line of energy along the length of your spine from your tailbone to the base of your neck and up to the crown of your head.
  • Stand well and breathe easily for one to two minutes.
  1. Seated Side Stretch (Parsva Sukhasana)

You bend forward and back throughout the day, but the sides of your body are often neglected. The muscles around and between the ribs, the intercostals, and the abdominal muscles that wrap around the waist, the transverse abdominis, are important muscles to stretch and strengthen for better posture. This is a beneficial pose to help with taking deeper breaths and for supporting a healthy spine. Give it a try:

5

  • Find a comfortable seat on your yoga mat. You can cross your legs or sit back on your heels. For low back support and added comfort you may like to sit on a pillow or folded blanket.
  • Enjoy a few deep breaths to get grounded and centered.
  • Crawl your left fingers out to your left side. Place your hand or elbow flat on the ground and push gently to maintain both sitting bones connected to the earth.
  • Reach your right arm over and across your ear.
  • Allow your head and neck to relax toward your shoulder.
  • One option is to hold there and breathe deeply for one to two minutes. Another option is to circle your wrist, circle your arm, or move organically to open up various areas of tightness on the entire right side.
  • Come back up to center and repeat on the second side.
  • Take a few moments to rest in a comfortable seat at center when you complete both sides.
  1. Corpse Pose (Savasana)

To the outside observer this pose may appear as if you’re just lying there (honestly, you ARE!), but you know that to get set up and comfortable, this pose requires mindful awareness. As you learn to surrender in this pose, all of the muscles in your body that work hard for you while you’re standing, sitting, and walking are able to relax. Learning to allow your back muscles to relax is key to making sure your body isn’t too fatigued to allow you to stand with better posture. Note: This pose is often much more challenging mentally than physically! Set a timer or give yourself a pep talk beforehand if it’s a new one for you. Give it a try:

6

  • Come to rest on your yoga mat on your back. If you like to have your head supported, place a pillow or blanket beneath your head. If you experience any low back tenderness, place a pillow or rolled up blanket beneath your knees.
  • Tuck your shoulders slightly and comfortably underneath you to prop up your chest.
  • Spin your palms to face up and open down by your sides.
  • Shake out your legs and allow your feet to flop gently out to the sides.
  • Take several deep, sighing breaths and close your eyes.
  • Rest in savasanafor five to ten minutes (or longer if you have time!) When you’re ready to get up, roll gently to one side and rest there for a few breaths before coming up to sit.

Have you been experiencing back or neck pain? Has anyone ever told you to stand up straight? Have you been feeling low self-esteem? These simple yet profound yoga poses may be the posture correctors you’ve hoped for. Whether you rest on your back in savasanaonce a day (don’t knock this “easy” pose till you try it!) or create a short sequence to do before bed, over time these poses will be highly beneficial for supporting proper posture without having to step foot in a traditional yoga class. And you may even notice the effects on your mind and spirit as well!

By Lena Schmidt

Stuffed Sweet Potatoes with Garlic Tahini Drizzle

potatoes

These are no ordinary sweet potatoes! Loaded with tender kale and strips of naturally sweet carrots along with bell pepper, red onion, sesame seeds and fresh parsley, this simple and nutritious meal can be made in less than an hour. They’re ideal for families with young kids who love to “build their own meals.”

My trick to a perfectly roasted sweet potato is to rub it with extra virgin olive oil before baking. Feel free to swap yellow or red bell peppers with green for an extra touch of sweetness. Whichever peppers you prefer, you can expect lots of nutrients such as vitamins A, C and K as well as B6 and potassium, all of which are needed to keep your immune system healthy, especially as the weather gets cooler this fall.

The fresh herbs, sweet potatoes and kale in this recipe are loaded with fiber, which is key to keep our digestion happy and moving along (detoxification). You can also use fresh basil or cilantro to switch up the garnish depending on what your tastebuds are craving. Lastly, the Garlic Tahini Drizzle is a terrific source of calcium. If you’re like me and can’t eat dairy, this is a great way to get your calcium fix as well as a good dose of magnesium and potassium.

Ingredients

Sweet Potatoes

  • 4large sweet potatoes, washed and scrubbed
  • 1 tablespoonextra-virgin olive oil for the sweet potatoes
  • 1 large headdinosaur flat kale
  • 2 tablespoonsextra-virgin olive oil for the kale
  • Large pinchsea salt
  • 2large carrots, peeled or thinly sliced with ends trimmed
  • 1large green bell pepper, diced
  • 1/4 cupred onion, diced
  • 1 teaspoonsesame seeds
  • 2 teaspoonsfinely chopped fresh parsley
  • Sea salt and ground pepper to taste

Garlic Tahini Drizzle

  • 1/3 cuptahini, well-stirred
  • Juice of 1 large lemon
  • 3 tablespoonswater, warm, plus more as needed
  • 2medium garlic cloves, minced
  • 1/2 teaspoonsea salt
  • 1/4 teaspoonpepper
  • Large pinchground cumin

Directions

  1. Preheat oven to 400 degrees F. Prepare a large rimmed baking sheet with parchment paper.
  2. Rub the sweet potatoes with 1 tablespoon of olive oil until completely coated.
  3. Poke potatoes with a fork and arrange them on the prepared baking sheet. Roast for 45 to 50 minutes or until the sweet potatoes are very tender. Note: Roasting time will depend on how large your sweet potatoes are.
  4. In a large bowl, combine the remaining 2 teaspoons of olive oil with the kale and gently massage the kale with your hands. Add a pinch of sea salt and continue to massage for about 2 to 3 minutes, until the kale is dark green and tender. Set aside.
  5. In a small bowl, combine the Garlic Tahini Drizzle ingredients until smooth. Add more tahini as needed.
  6. Remove the sweet potatoes from the oven and slice them lengthwise about three-fourths of the way through. Let cool for 5 to 10 minutes.
  7. Add the massaged kale on top of the split potatoes, followed by the peeled carrot strips, green pepper, red onion, sesame seeds, and parsley. Season to taste with sea salt and pepper and drizzle with the Garlic Tahini Drizzle. Serve immediately.
  8. Store leftovers, either preassembled or ingredients separately, in a sealed container(s) in the refrigerator for up to four days.

Yield4 Servings


By: Amie Valpone

Photography by Amie Valpone


Stuffed Tomatoes with Brown Rice & Vegetables

tomatoes

These stuffed tomatoes look impressive, but they are simple to make and can be prepared up to a day ahead as an easy side dish for weeknight meals. Plus, it’s an easy way to pack a variety of vegetables into one meal, as the tomatoes are stuffed with zucchini, onion, spinach, and carrot along with fiber-rich brown basmati rice. For more details about how to make this dish watch a video demonstration here.

Ingredients

  • 4large tomatoes, with tops cut off and pulp removed
  • 1zucchini, grated
  • 1/2onion, grated
  • 2 clovesgarlic, grated
  • 3 clovesgarlic, whole
  • 1/4 bunchparsley, chopped
  • 1 handfulbaby spinach, chopped
  • 1carrot, grated
  • 1/3 cupbrown basmati rice
  • Salt and pepper to taste

Directions

  1. Preheat oven to 375°F.
  2. Mix the chopped and grated ingredients together with the rice. Stuff the mixture into the tomatoes so each one is about three-quarters full. Put the tops back on the tomatoes.
  3. In a 9-inch dish, add tomato pulp, 2 cups water, and whole garlic cloves. Put tomatoes in the dish and cover with foil. Place the dish in the oven and cook for about 45 minutes.
  4. Before serving, let the tomatoes sit covered for about 20 minutes.

Nutritional Information

Calories

117

Total Fat

1g

Saturated Fat

0.2g

Cholesterol

0mg

Sodium

59mg

Carbohydrates

25.5g

Dietary Fiber

5g

Sugars

7g

Protein

4.5g

YIELD:

4 servings


By Andy Clay

The Common Stress Solutions That Make You Lose Sleep

sleeplessnessBefore you attempt to shut out stressful thoughts or reach for that glass of wine, you may want to reconsider your coping methods if you want to find peace of mind.


After a stressful day, few things sound better than a glass of cabernet and scrolling through your DVR, right? Not if you’re hoping to get a good night’s rest. It turns out that many of the techniques people commonly use to cope with anxiety may actually make stress worse and increase the likelihood that you’ll experience insomnia, reports a recent study in the journal SLEEP. In fact, three of the most common coping behaviors—using drugs or alcohol, self-distraction like watching TV or going to the movies, and behavioral-disengagement, also known as ignoring an issue—were associated with an increased incidence of insomnia.

The study of 2,892 individuals illuminated the interplay of a variety of factors for stress-related insomnia, such as the roles of gender, age, level of baseline stress level, and the chronicity of stress exposure over time. In the report, women were 1.4 times more likely to develop insomnia than men. Participants with higher levels of stress at baseline and people who experienced chronic stress exposure were also more likely to develop insomnia. While some of these effects have been observed in past research, this study is the first that examined other variables such as cognitive intrusion, or the degree to which stress disrupts the normal train of thought, and coping mechanisms, such as substance use or avoidance, as they relate to insomnia.

It turns out that the way you react to stress plays a major role in determining whether or not you’ll lose sleep. The findings indicate that the effect of stress exposure on risk of insomnia is significantly impacted by how much it infiltrates one’s thought process. A high level of cognitive intrusion greatly affects one’s odds of developing insomnia, and interestingly, past research has shown that attempts to suppress arousing thoughts triggered by stress tend to be ineffective and associated with poor sleep outcomes. Additionally, problematic coping strategies such as alcohol use and avoidance lead to sleep disturbances and can trigger a vicious cycle of ongoing insomnia and anxiety.

While the effects of positive coping behaviors were not measured in this survey, the researchers note that mindfulness-based therapies have shown promise in suppressing cognitive intrusion and improving sleep. That may be because mindfulness helps you deal directly with stress, while other coping strategies gloss over problems without addressing the issue, says Lodro Rinzler, a meditation practitioner and teacher in the Shambhala Buddhist lineage and author of the book The Buddha Walks into the Office. “The issue is still there, but it’s just getting bigger and badder. When it comes time to fall asleep, it’s like trying to put your car into the garage at 120 miles per hour. It’s just not happening.”

Instead, Rinzler suggests using healthier solutions to relinquish stress—not just at night, but around the clock—so your body and mind can relax, making it easier to get some shut-eye.

First thing in the morning:Set an intention. “Most people wake up and think, ‘I just want to get through the day,’” Rinzler says. That immediately puts you in a stressful mindset because you’re expecting a storm of unpleasant responsibilities and interactions that you’ll need to endure. When you begin your day with a positive intention such as “I’m going to smile more,” or “I’m going to be more generous,” you completely transform your daily experience from the outset. “The day is no longer something to get through but an opportunity to cultivate a positive quality within yourself,” Rinzler says. At the end of the day, it also gives you a new measure of progress. Rather than dwelling on how much you did (or didn’t) get accomplished, which may only generate more stress, come back to your intention and ask yourself how it went. If you feel like you cultivated the qualities you were hoping to achieve, you feel a sense of success and have the positive experiences that occurred because of them. (That stranger smiled back at me!) If you forgot about your intention, simply remind yourself that tomorrow’s another day and you can make an effort again, Rinzler says. “You’re measuring yourself against who you want to be in your day-to-day life versus who others want you to be. It’s very refreshing and gives you a sense of accomplishment and control.”

In the afternoon:Pause once a day. Set a timer on your phone to go off once a day. During that time, raise your gaze above your computer screen and connect with your breath. Notice your inhales and exhales for just 30 to 60 seconds. “This break cuts through the habitual speed and stress of your day,” Rinzler says. “You’re consciously hitting the reset button rather than allowing the day’s stress to pile up without any reprieve.” Later, rather than trying to park your car in the garage at full-speed when it’s time for bed, you’ve given yourself an opportunity to slow down and restart at least once that day. During more stressful times, set your alarm and practice this simple task every few hours to prevent stress from snowballing.

At bedtime:Let go of the storyline. “What keeps us awake at night are all of the thoughts, opinions, and expectations we have around a stressful event, even more than the stressful thing that happened or is going to happen,” Rinzler says. He dubs these thoughts your “storyline.” Often this is what causes your mind to race and interferes with your ability to nod off. “For example, you’re lying in bed having a conversation in your mind with a coworker or drafting an email that you’re going to write first thing in the morning.” To switch gears, tune into what’s going on right now in your body. When you’re feeling stressed, ask yourself, “What does it feel like in my body? Does it have a temperature? Shape? Color?” It’s the complete opposite of behavioral disengagement and puts you right there on the frontlines of your experience with stress. “The more we examine stress from this standpoint, the more it brings us into the present moment, draws us into our body and away from our stressful thoughts,” Rinzler says. Notice the sensations you’re experiencing and picture stress washing over you like a wave and then retreating with the tide. “From this perspective, stress feels more fleeting and less permanent than you thought.”

By Paige Fowler


A Natural Guide to Overcoming Sleep Issues

If you are one of the millions of Americans who toss and turn at night, these natural sleep remedies could offer welcome respite from restlessness and exhaustion.


There’s nothing quite like that ready-to-take-on-the-world feeling after a good night’s rest. But if you frequently find yourself wide awake as the evening hours tick away, feeling bright-eyed the next day may seem like a dream. The good news? Restful sleep is within reach—no Ambien necessary. After all, the sleeping pill and some of its snooze-inducing cousins are associated with some unwelcome side effects such as compromised short-term memory as well as walking, eating, and drivingin your sleep. No thank you!

If you’re struggling with sleep issues and traditional advice hasn’t made a difference, you might consider visiting a naturopathic doctor or other complementary health care practitioner for natural sleep remedies. At first, the basic recommendations will likely be similar whether you see a conventional doctor or a complementary medicine practitioner. For example, it’s important to make sure your bedroom is conducive to sleep. It should be dark, not too hot and not too cold, and quiet. It’s also important to evaluate your physical activity routine. Intense exercise late in the day can also be overly stimulating, whereas yoga and deep breathing can help you nod off more easily.

If basic advice doesn’t help enough, a physician would likely recommend a prescription for a sleep medication, whereas a complementary medicine practitioner will continue to look at your experience holistically to provide more customized natural sleep remedies. He or she will take into account the whole person, not just your sleeping problem as an isolated issue, to better understand the root cause. Here, I’ve outlined eight of the most tried-and-true natural remedies that can help address common factors that disrupt sleep. You can apply many of these yourself, or you can work with a professional for more comprehensive therapy.

Watch what you eat and drink.Avoid caffeine past 3 p.m. so your body can metabolize it before it’s time to go to bed. Avoid alcohol two to three hours before bed. Alcohol helps you fall asleep initially, but many people wake up two to three hours later. Lastly, eating heavy, spicy, or greasy meals before bedtime can interfere with sleep. If possible, have your last meal about three hours before bed. Hunger can interrupt sleep, too, so if you feel pangs before bed it’s okay to have a light snack.

Sip herbal tea.About an hour before bedtime, pour yourself a cup of herbal tea containing ingredients known to aid relaxation such as chamomile, skullcap, lemon balm, or passion flower. Brands such as Celestial Seasonings Sleepytime and Yogi Tea Bedtime Tea contain some of these herbs. If you get into the habit of sitting down to a steaming mug of herbal tea about an hour before bedtime, it also creates a routine and signals to your brain that it’s time to quiet down and get ready for sleep.

Try trigger points.Certain acupressure points can help relax and quiet the mind. Liver 3 is located on the top of your foot between the big toe and second toe, a few inches down—you’ll feel a depression the size of your fingertip. This point helps draw energy from your mind down. Large intestine 4 is located on the topside of the hand on the web between the thumb and index finger. It’s used for headaches, and it helps relax the mind and improve circulation. Pericardium 6 is on the inside of the wrist between the two tendons. It’s used for nausea, but also alleviates nervous tension. Apply pressure to each spot for five to 10 seconds, release, and repeat a few times as necessary.

Sonima_Illustration_1

Supplement with B vitamins.Sleep problems sometimes stem from a compromised nervous system. B-complex vitamins play a key role in maintaining a healthy nervous system. Supplementing your diet with B vitamins may help sleep come more easily. This isn’t a quick fix, but if you take them daily in the mornings you should notice an improvement in your sleep within about a month. For the first month you may want to try a B-complex in liquid form, which is often easier to absorb than a pill.

Get help from homeopathy.Calms andCalms Forteare two homeopathic remedies that can be taken before bed to aid sleep. These are non-sedative treatments comprised of homeopathics and usually come in the form of little white pellets. If you have mild sleep problems, such as difficulty sleeping while traveling, these remedies can help you regain a normal sleep cycle after three or four nights.

Pop melatonin on sleepless nights.This is the ingredient many of my patients with sleep issues find the most success with, though it’s particularly effective for people over age 50 since the body’s production of melatonin decreases with age. Melatonin is a hormone produced by the pineal gland in the brain that helps maintain your body’s circadian rhythm. If you experience maintenance insomnia, in which you can fall asleep, but wake up two to three hours later, taking a dose of melatonin when you wake up during the night may help you fall back asleep. In younger adults, melatonin may not be as helpful if you’re still producing the hormone at normal levels. For younger adults consider chamomile tea, homeopathics, and B complex.

Take magnesium before bed.In one study, people with insomnia who took magnesium daily for eight weeks fell asleep faster, slept longer, and woke up fewer times at night than those who popped a placebo, the Journal of Research in Medical Sciences reports. How, exactly, magnesium helps isn’t completely understood, though participants who took the supplement showed increased levels of melatonin and other hormones associated with sleep as well as decreased cortisol concentrations. For sleep specifically, many people report doing better with a powder or liquid form of magnesium as opposed to a tablet. Follow the package dosage instructions and take it before bedtime.

Vitamin D. At your next doctor’s visit, consider getting your level of vitamin D checked. There is plenty of research and anecdotal evidence supporting the connection between vitamin D supplementation and improved sleep. Vitamin D should be taken in the morning and not at night.

Get hands on.Get a back massage or ask your partner to rub the muscles on either side of your spine, which is relaxing to the mind, body, and entire nervous system. Add your favorite soothing essential oil such as lavender, chamomile, bergamot, lemon, or ylang ylang for an aromatherapy benefit.


By Dr. Janet Zand

Tired All the Time? Try These Natural Energy Boosters

tiredYou don’t have to feel drained on a daily basis. Here’s how to keep your energy tank full. If you’re running low right now, try these instant pick-me-ups.


If you’re tired all the time you’re not alone. The Centers for Disease Control and Prevention have gone so far as to call Americans’ lack of sleep a “public health epidemic.” Chronic fatigue is also related to a variety of medical conditions including autoimmune disease, thyroid disorders, depression, and anemia. Combine any of these possibilities with long hours at work and it’s no surprise you’re reaching for a third cup of coffee by 3 o’clock. But there are other natural ways to boost energy that will provide a more sustainable lift and won’t compromise your ability to wind down in the evening so you can finally get the rest you need. Read on for a few research-supported strategies to stay energized all day long.

Balance your carb consumption.That afternoon slump may happen because you’re bored at work, but more than likely it has a lot to do with what you just ate for lunch. Your body and brain need food for fuel, but when a lot of the calories you consume come from carbohydrates—such as the bread used in sandwiches or a hearty bowl of pasta—you may start to feel sleepy about an hour after eating. Carbohydrates are absorbed into your blood stream almost immediately after eating. Right after a carb-heavy meal your blood sugar will experience a big surge then, when all the carbs are used up, your blood sugar will plummet, bringing on that feeling of fatigue. However, calories that come from fiber, fat, and protein take longer to release. For even all-day energy, eat a mix of nutrients at each meal and snack, including plenty of fiber-rich veggies and fruits, lean proteins such as chicken or beans, and some healthy fat, such as that found in avocados and olive oil.

Sniff some mint.Have you ever noticed that spas tend to smell of flowers such as lavender and ylang ylang? Studies show that these scents increase calmness, which is right for that setting. If you were to look for an essential oil that had the opposite effect—one that made you more energized and alert—choose peppermint. This distinct odor has the opposite effect of soothing essential oils, although it’s still a pleasant scent. Peppermint can even enhance your memory, according to a study in the International Journal of Neuroscience.

Take in more B12.Even if you eat a balanced diet, you may be deficient in important nutrients. If you’re feeling sluggish, try increasing your intake of vitamin B12. This vitamin is naturally found in animal-derived foods like meat, fish, poultry, and dairy, which explains why many vegetarians and vegans may not get enough through diet alone. (Vitamin B12 is also important for anemia prevention.) Vitamin B12 supplements can be found in the vitamin aisle of most grocery stores; you can take this vitamin on its own or in a blend of other B vitamins.

Go to yoga or take a walk.It may seem like being active will only make you feel more tired and it can be true—going to an intense bootcamp class may make you want to take a nap. But engaging in low or moderate activity—such as a short walk or a yoga session—can boost energy levels, according to an article from the journal Psychotherapy and Psychosomatics. This sort of exercise is enough to increase your circulation—and with it the blood and oxygen flow to your body and brain—without actually tiring you out. The next time you feel fatigued but you really need to be awake, try it out: Go on a brisk 10- or 20-minute walk and see how you feel after. Chances are you’ll be much more awake than when you left. For a quick yoga pick-me-up try some repetitions of Sun Salutation A, demonstrated in the video below.

Relax to rev up.If you’re feeling stressed or anxious, all of that mental churning can zap your energy levels—it’s the equivalent to your mind running a marathon. Shift your thoughts to more of a leisurely stroll and you’ll feel a whole lot less drained. Easier said than done? Try meditation. Simply focusing on your breath can help you relax and, according to a study in the Annals of the New York Academy of Sciences, it can also increase your alertness. To start: Close your eyes and notice your inhales and exhales for a couple of minutes. Let your thoughts drift in and out, trying not to focus on any one.

Breathe some fresh air.When the couch is calling, get back to nature. A study from the Journal of Environmental Psychologyfound that being in the outdoors is a simple way to increase feelings of vitality. In the study, people who spent just 20 minutes outside felt more awake than those who spent the same amount of time inside. Being active, such as walking or gardening, can help increase these feelings. No chance to escape four walls? Simply imagining a natural setting can help, according to the researchers.

Set a routine bedtime.To put the power in your power suit, you must give your body and brain adequate time to rest and recharge at night. If you often hit snooze in the morning or wake up feeling like you haven’t rested enough, move your bedtime forward to ensure you get at least 7 or 8 hours of sleep each night. (Have a hard time shutting off your screen time? Set an alarm on your phone to remind you it’s time to unwind.) A recent study in the Journal of Primary Health Carefound that going to bed earlier and practicing better sleep hygiene, such as limiting screen time before bed, improved sleep for 73 percent of participants.


Keep a water bottle handy.If you’re feeling fatigued, keeping H2O on tap will help refill your energy stores. Even mild dehydration can make you feel tired and decrease your ability to concentrate, according to a study in The Journal of Nutrition. Experiencing headaches or feeling lethargic can signal that you need more fluids. Feeling thirsty can also be a sign that you’re already dehydrated. Aim to drink around eight 8-ounce glasses (nope, this is not a myth!) or four 16-ounce bottles of water each day. If you exercise regularly, you may need to drink more.

By Jessica Cassity